Introduction
While Hexo makes it incredibly convenient to deploy blogs, what happens when we switch computers? The content on Github is actually just what’s in the .deploy_git directory of our local folder. Clearly, we need to back up the source files by pushing them to Github. This way, we can simply clone them to our local machine, do a quick configuration, and we’re good to go.
Backup Process
Creating a New Branch
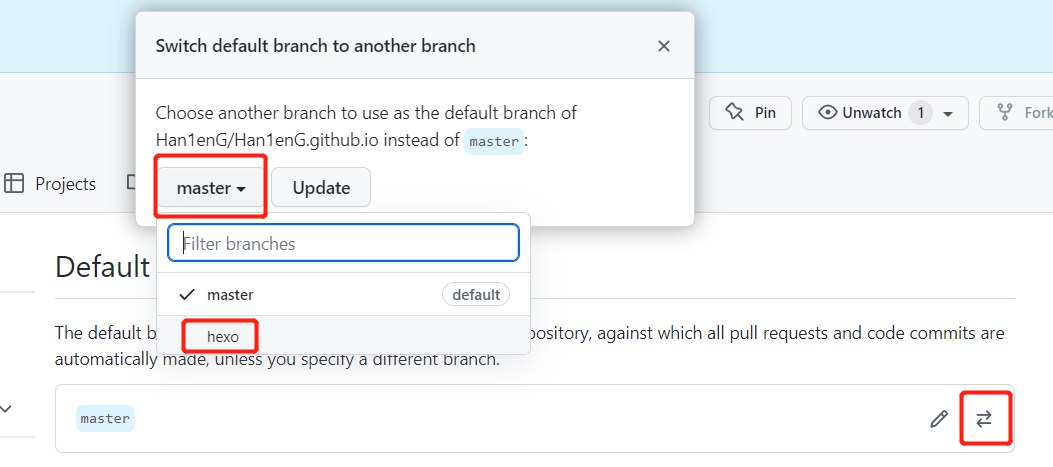
On the Github repository for your blog, create a new branch named hexo and set this branch as the default.

Cloning the hexo Branch
1$ git clone [email protected] # (your github page repository address)
Copy the .git file from the cloned folder to the root directory of your blog. If you can’t find the .git file, it’s probably hidden.

Starting the Backup
Navigate to the root directory of your blog and open Git Bash.
1$ git add .
2$ git commit -m "Backup"
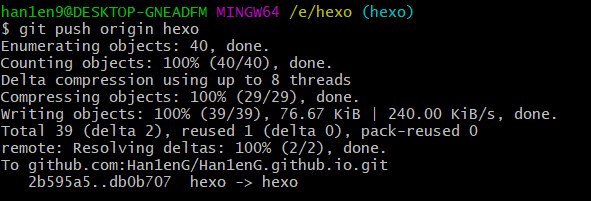
3$ git push origin hexo
At this point, you should see the backup completed on Github.
After any future changes, you can execute the following commands:
1$ hexo clean
2$ git add .
3$ git commit -m "backup"
4$ git push
5$ hexo g -d
Local Restoration
On a new computer, set up the
Hexoenvironment, configure theGit SSH key, and clone the blog source code:1$ git clone [email protected] # (your github page repository address)After cloning, the default branch will be
master. You’ll need to switch to thehexobranch (steps omitted):1$ git branch -a # View all branches 2$ git checkout origin/hexo # Switch to the hexo branchExecute the following commands:
1npm install hexo-cli --save
2npm install
3npm install hexo-deployer-git --save